| |
Netscape Mail 4.0 - 4.6
Step 1. Open Netscape Messenger.
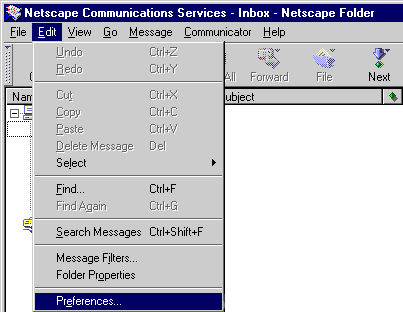
Step 2. From the Edit menu, select Preferences.
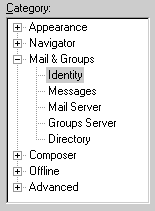
Step 3. Click the + next to Mail & Groups and select Identity.
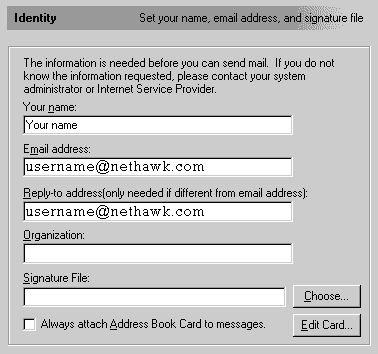
Step 4. In the Your Name text box, type your name.
Step 5. In the Email Address text box, type username@nethawk.com
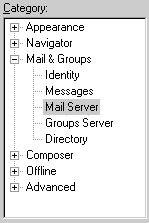
Step 6. Under Mail & Groups, select Mail Server.
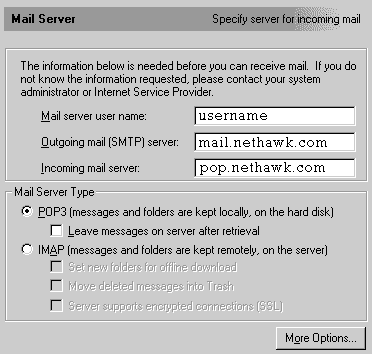
Step 7. In the Mail server username text box, type your Member ID.
Step 8. In the Outgoing mail [SMTP] server text box, type mail.nethawk.com
Step 9. In the Incoming Mail Server text box, type pop.nethawk.com
Step 10. Click OK to exit.
|
|
| Don't Qualify? |
| |
If you do not qualify for ISP Wireless at this time, you may qualify for DSL.
DSL is our other broadband service.
To see if you qualify for DSL, click here.... |
|
| No Hidden Fees |
| |
Cable companies charge extra for setup and modem rentals.
ISP Wireless does not charge extra for anything! We have no hidden fees whatsoever! |
|
|